Sharing collections with other users
To open the Share with Colleagues dialog box, click Modify List on the User Rights dialog box.
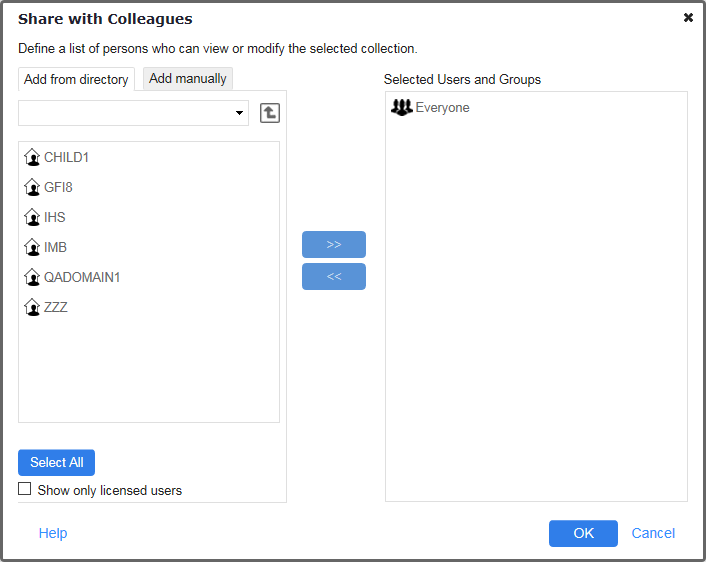
In the Share with Colleagues dialog box, specify the users and user groups that will be allowed or denied access to shared data collections. Add users and user groups from either your company's user directory, or add them manually. Adding the names manually takes less time, since you don't have to download the user directory.
You can specify the EVERYONE group in the list to facilitate the process of defining access rights.
The EVERYONE user group
Goldfire has a default group EVERYONE, which includes all users in the entire user directory. This group does not map to any group in the user directory.
The group EVERYONE is used to facilitate the process of granting access to most, but not all, members of a directory. For example, you can Allow access for EVERYONE, and then Deny access to specific users or groups.
The group EVERYONE can be selected in the Add from directory tab, or typed manually in the Add manually tab.
- In the Share with Colleagues dialog box, click the Add from directory tab.
To view only licensed users, select the Show only licensed users check box.
-
From the list below the tab header, double-click the domain whose user list to browse.
- To show users as well as user groups in the directory, click Show Users.
- Displaying the list of enterprise users and user groups can take a long time for large user lists. If you click Hide User, only user groups are displayed.
- The domain list is not available if you have an LDAP user directory.
- To view the users in a specific group, double-click the name of the user group.
To return to the next level up in the directory, click  .
.
- Select one or more users or user groups from the directory list.
- To make multiple nonadjacent selections, hold down the Ctrl key while clicking each item in the list.
- To make multiple adjacent selections, click the first item, hold down the Shift key, and then click the last item.
- ClickSelect All to select all users and user groups in the list. Click Clear All to clear all selections.
- Click Add.
This moves the user names and group names to the Selected Users and Groups list.
If you change your mind and want to exclude some of these users or groups, select them, and then click Remove.
- When you are done, click OK.
- In the Share with Colleagues dialog box, click the Add manually tab.
- Under Enter the user or group names, type the names of users and user groups. For example, type domain2\dlanders. Press Enter after each entry.
- Click Add.
This moves the names of the selected users and groups to the Selected Users and Groups list. If you change your mind and want to exclude some of these users or groups, select them, and then click Remove.
- Click OK.
User names and user group names are verified against the user directory. Names that cannot be found in the directory are listed in the Unverified Users or Groups dialog box. You must either modify these names or remove them from the list.